
Are you ready to bring vibrant colors and delicate beauty to your garden or indoor space? In this article, we will provide you with expert tips and guidance on how to successfully grow and care for tulips. Whether you are a seasoned gardener or just starting out, these valuable insights will help you create a stunning display of tulips that will be the envy of your neighbors.
Tulips are a popular choice among gardeners due to their wide range of colors and shapes. Before diving into the world of tulip gardening, it’s important to choose the right tulip varieties that suit your preferences and gardening needs. There are various types of tulips, including single early, double early, triumph, and parrot tulips, each with its own unique characteristics. Consider factors such as bloom time, height, and color when selecting your tulip varieties.
Once you have chosen the perfect tulip varieties, it’s time to prepare the soil and plant the tulip bulbs. Tulips thrive in well-draining soil that is rich in organic matter. Prepare the soil by removing any weeds or debris and adding compost or aged manure to improve its fertility. Follow the step-by-step instructions for planting tulip bulbs, ensuring that they are planted at the correct depth and spacing. Proper planting techniques will promote healthy growth and ensure beautiful blooms.
Choosing the Right Tulip Varieties
When it comes to choosing the right tulip varieties for your garden, there are a wide range of options available. From classic single-flowered tulips to exotic double-bloom varieties, each type offers its own unique beauty and charm. To select the best tulips for your specific gardening needs, it’s important to consider factors such as color, height, bloom time, and overall garden design.
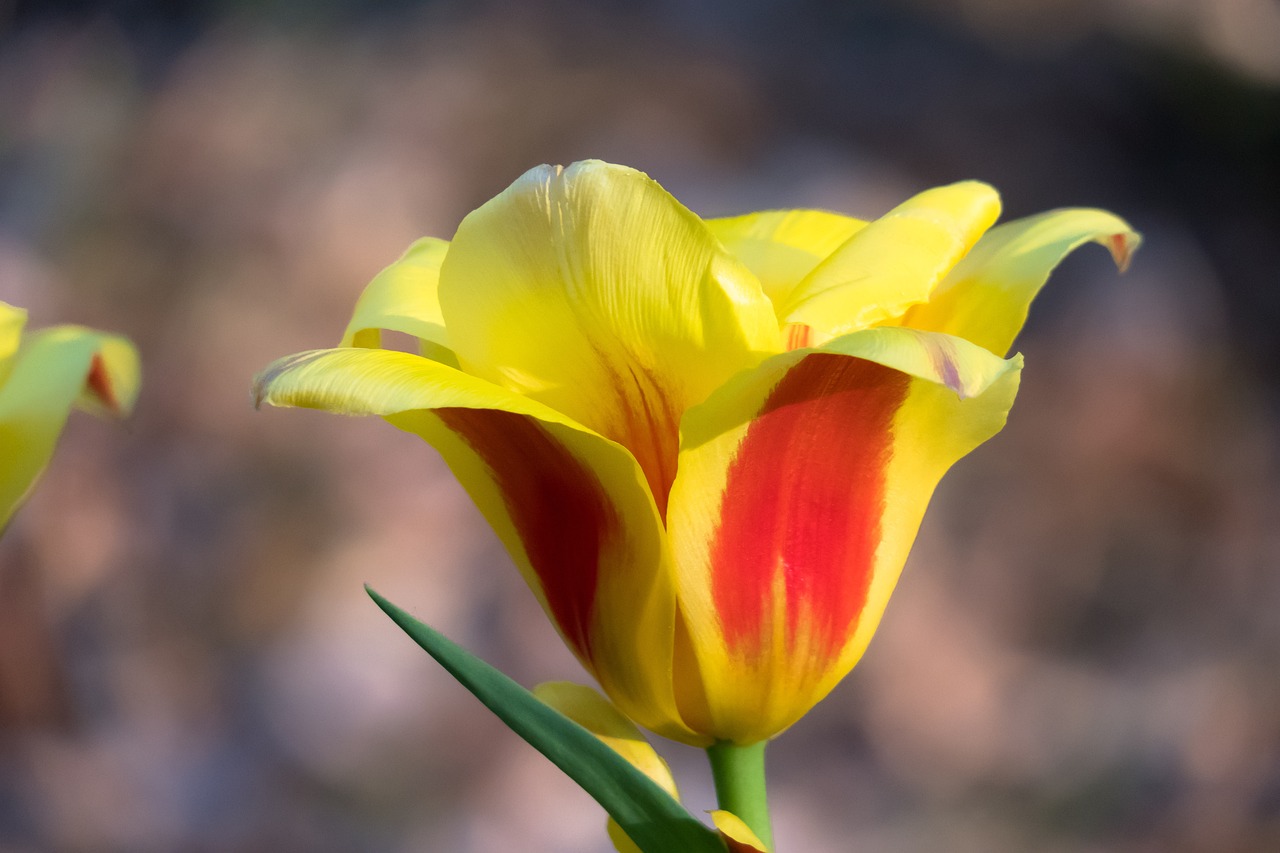
One way to narrow down your choices is by creating a color scheme for your garden. Tulips come in a wide array of colors, including vibrant reds, pinks, yellows, purples, and whites. By selecting tulips that complement or contrast with the existing colors in your garden, you can create a visually stunning display. Additionally, consider the height of the tulip varieties you are interested in. Some tulips grow tall and make excellent focal points, while others are shorter and work well in borders or containers.
Another important factor to consider is the bloom time of the tulip varieties. Tulips bloom at different times throughout the spring, so by selecting a mix of early, mid, and late blooming varieties, you can ensure a continuous display of color. This can be especially useful if you want to enjoy tulips for an extended period of time. Finally, think about the overall design of your garden and how the tulip varieties you choose will fit into that design. Do you want a formal, symmetrical garden or a more natural, informal look? This will help guide your selection process.
Preparing the Soil and Planting Tulip Bulbs
Before planting tulip bulbs, it is essential to prepare the soil properly to create an optimal environment for healthy growth and vibrant blooms. Here are some soil preparation techniques and step-by-step instructions to ensure successful tulip planting:
- Choose a well-draining location: Tulips prefer soil that drains well to prevent waterlogging, which can lead to root rot. Select a spot in your garden that receives full sun or partial shade.
- Test the soil pH: Tulips thrive in slightly acidic to neutral soil with a pH range of 6.0 to 7.0. Conduct a soil test to determine the pH level and make necessary adjustments by adding lime to raise the pH or sulfur to lower it.
- Loosen the soil: Use a garden fork or tiller to loosen the soil to a depth of 12 to 15 inches. This will improve aeration, drainage, and root penetration.
- Remove weeds and debris: Clear the planting area of any weeds, rocks, or debris that may hinder bulb growth.
- Add organic matter: Enhance the soil’s fertility and structure by incorporating organic matter such as compost, well-rotted manure, or peat moss. Mix it thoroughly with the loosened soil.
Now that the soil is prepared, it’s time to plant the tulip bulbs. Follow these step-by-step instructions:
- Choose high-quality bulbs: Select firm, plump bulbs free from mold or blemishes. Larger bulbs tend to produce bigger and more robust blooms.
- Dig the planting holes: Use a garden trowel or bulb planter to dig holes that are approximately 6 to 8 inches deep. Space the holes about 4 to 6 inches apart to allow for proper root development.
- Plant the bulbs: Place each bulb in the hole with the pointed end facing upward. Cover the bulbs with soil, gently firming it around them to eliminate air pockets.
- Water thoroughly: After planting, give the bulbs a good watering to settle the soil and initiate growth. Ensure the soil remains evenly moist but not waterlogged throughout the growing season.
By following these soil preparation techniques and planting instructions, you can provide the ideal conditions for tulip bulbs to thrive and produce stunning blooms in your garden.
Optimal Growing Conditions for Tulips
When it comes to growing and caring for tulips, providing the optimal growing conditions is crucial for their successful growth and beautiful flowering. Tulips thrive in specific environmental conditions that include sunlight, temperature, and moisture. Let’s take a closer look at each of these factors:
Tulips are sun-loving plants and require at least 6 hours of direct sunlight each day to thrive. It is important to choose a planting location that receives ample sunlight, preferably in a spot that faces south or west. If you are growing tulips indoors, place them near a sunny window or use artificial grow lights to provide the necessary light.
Tulips are cold-hardy plants that prefer cool temperatures for optimal growth. They thrive in temperatures between 55°F and 65°F (13°C and 18°C) during the day and slightly cooler temperatures at night. Avoid planting tulips in areas with extreme heat or where temperatures consistently exceed 75°F (24°C), as this can cause the bulbs to become dormant or fail to flower.
Tulips require well-draining soil to prevent waterlogged conditions, which can lead to bulb rot. It is important to ensure that the soil is moist but not overly saturated. Water the tulips deeply once a week, providing enough water to penetrate the root zone. However, avoid overwatering, as this can also lead to bulb rot. Mulching around the base of the tulips can help retain moisture and regulate soil temperature.
By providing the ideal environmental conditions of sunlight, temperature, and moisture, you can ensure that your tulips grow and flower to their full potential. Remember to monitor these conditions regularly and make any necessary adjustments to promote healthy growth and vibrant blooms.
Watering and Fertilizing Tulips
Watering and Fertilizing Tulips
Proper watering and fertilizing are essential for keeping your tulips healthy and vibrant throughout their growth cycle. Here are some important tips to ensure your tulips are well-nourished:
- Watering: Tulips require regular watering, especially during dry periods. It’s important to keep the soil evenly moist but not waterlogged. A good rule of thumb is to provide about 1 inch of water per week, either through rainfall or manual watering. Avoid overwatering, as it can lead to root rot and other problems.
- Fertilizing: Tulips benefit from a balanced fertilizer that provides essential nutrients. Before planting the bulbs, incorporate a slow-release fertilizer into the soil according to the package instructions. Once the tulips begin to emerge, you can apply a liquid fertilizer every 3-4 weeks to promote healthy growth and blooming.
It’s important to note that tulips have different nutrient requirements at different stages of their growth cycle. When the leaves are actively growing, they need more nitrogen for foliage development. As the flowers begin to form, a fertilizer with higher phosphorus content can help promote blooming. Be sure to follow the recommended dosage and timing instructions for the specific fertilizer you are using.
Additionally, mulching around the base of the tulip plants can help retain moisture, regulate soil temperature, and suppress weed growth. Use organic mulch, such as shredded leaves or straw, and apply it in a layer about 2-3 inches thick. This will also help to protect the bulbs during colder months.
By providing proper watering and fertilizing, you can ensure that your tulips receive the necessary nutrients for healthy growth and stunning blooms.
Protecting Tulips from Pests and Diseases
Tulips, like any other plants, are susceptible to pests and diseases that can hinder their growth and overall health. However, with the right strategies and preventive measures, you can ensure that your tulips remain vibrant and free from damage. Here are some effective ways to protect your tulips from pests and diseases:
- Inspect and clean: Regularly inspect your tulips for any signs of pests or diseases. Remove any dead or infected leaves, stems, or flowers to prevent the spread of diseases.
- Provide proper spacing: Plant your tulips with adequate spacing to allow proper air circulation. This helps prevent the buildup of moisture, which can attract pests and promote disease development.
- Use organic pest control: Consider using organic pest control methods, such as neem oil or insecticidal soap, to manage common tulip pests like aphids, slugs, or snails. These natural solutions are safe for the environment and effective in controlling pests.
- Apply mulch: Mulching around your tulips can help deter pests and diseases. Use organic mulch, such as wood chips or straw, to create a protective barrier and maintain soil moisture.
- Practice crop rotation: Avoid planting tulips in the same location year after year. Rotate their planting spot to reduce the risk of soil-borne diseases and pests that may have overwintered in the soil.
- Monitor and treat early: Regularly monitor your tulips for any signs of pests or diseases, such as wilting, discoloration, or unusual growth. If detected early, you can take appropriate action, such as using targeted insecticides or fungicides, to prevent the problem from worsening.
By implementing these strategies, you can protect your tulips from common pests and diseases, ensuring their health and longevity. Remember to regularly care for your tulips and maintain a clean and healthy growing environment to keep them thriving.
Tulip Care and Maintenance
Tulip care and maintenance are crucial for ensuring the continuous blooming and long-term sustainability of these beautiful flowers. By following a few essential tasks, such as deadheading, pruning, and dividing tulip bulbs, you can help your tulips thrive and produce stunning blooms year after year.
Deadheading: Deadheading is the process of removing the spent flowers from the tulip plant. This not only keeps the plant looking tidy but also directs its energy towards producing new blooms instead of seed production. To deadhead a tulip, simply cut off the faded flower head just above the stem.
Pruning: Pruning tulips involves removing any damaged or diseased foliage or stems. This helps prevent the spread of diseases and encourages healthy growth. If you notice any yellow or wilted leaves or stems, carefully trim them off using clean pruning shears.
Dividing Tulip Bulbs: Over time, tulip bulbs can become overcrowded, leading to reduced blooming. Dividing the bulbs every few years helps maintain their vigor and ensures a healthy flower production. To divide tulip bulbs, dig them up after the foliage has withered and dried. Separate the bulbs, ensuring each division has its own roots and shoots, and replant them at the appropriate depth.
By regularly performing these care and maintenance tasks, you can enjoy a continuous display of vibrant tulip blooms in your garden. Remember to provide adequate water, sunlight, and fertilization as well to further support the health and longevity of your tulips.
Extending the Tulip Blooming Season
Extending the Tulip Blooming Season
Do you wish you could enjoy the vibrant beauty of tulips for a longer period? Well, you’re in luck! By implementing a few strategic techniques, you can extend the blooming season of your tulips and bask in their stunning colors for an extended period. Let’s explore some effective methods to make this happen.
Strategic Planting: One way to prolong the blooming period of your tulips is through strategic planting. Consider staggering the planting times of different tulip varieties. This way, you can ensure a continuous display of blooms throughout the season. Additionally, planting tulips in different locations within your garden can also help extend the blooming period. This is because microclimates in your garden may have slightly different conditions, resulting in variations in bloom time.
Mulching: Another technique to extend the tulip blooming season is through the use of mulch. Apply a layer of organic mulch, such as straw or wood chips, around the base of your tulip plants. Mulch helps regulate soil temperature and moisture levels, providing a more favorable environment for the tulips to thrive. This can lead to delayed blooming and a longer-lasting display of flowers.
Other Techniques: There are a few more tricks up our sleeves to extend the beauty of your tulips. Deadheading, the process of removing spent flowers, can redirect the plant’s energy towards producing new blooms. Additionally, providing adequate water and fertilizer throughout the growing season can promote healthy growth and prolonged blooming. Lastly, consider protecting your tulips from extreme weather conditions, such as strong winds or heavy rain, which can damage the flowers and shorten their blooming period.
By implementing these strategies, you can ensure that your tulips continue to dazzle your garden or indoor space for an extended period. So go ahead, plan your planting, mulch wisely, and take care of your tulips with love. You’ll be rewarded with an extended blooming season and a garden filled with the radiant beauty of tulips.
Forcing Tulips Indoors
Forcing tulips indoors during the winter months is a wonderful way to brighten up your home with a burst of color and cheer. By providing the right conditions, you can encourage tulip bulbs to bloom earlier than they would naturally. Here’s how to do it:
1. Choose the Right Bulbs: Select healthy tulip bulbs that are specifically labeled for forcing. These bulbs have been pre-chilled to simulate winter conditions and are ready to bloom indoors.
2. Preparing the Bulbs: Before planting, place the bulbs in a paper bag and store them in the refrigerator for 8-12 weeks. This chilling period is necessary for the bulbs to break dormancy and initiate flowering.
3. Planting the Bulbs: Fill a pot or container with well-draining potting soil. Plant the bulbs with the pointed end facing up, about 2-3 inches deep. Make sure to leave enough space between each bulb for proper growth.
4. Providing the Right Environment: Place the potted bulbs in a cool location with indirect sunlight. The ideal temperature for forcing tulips is around 50-60°F (10-15°C). Avoid placing them near heat sources or in direct sunlight, as this can cause the bulbs to dry out.
5. Watering and Care: Keep the soil evenly moist but not soggy. Avoid overwatering, as this can lead to rotting. Once the bulbs start to sprout, move the pot to a brighter location with indirect sunlight to promote healthy growth.
6. Enjoying the Blooms: In about 3-4 weeks, your forced tulips should start to bloom. Keep them away from drafts and extreme temperature changes to prolong the flowering period. Once the blooms fade, you can either discard the bulbs or plant them outdoors for future growth.
Forcing tulips indoors is a rewarding and enjoyable activity that allows you to enjoy the beauty of these vibrant flowers even during the winter months. With a little patience and care, you can create a stunning display of color and bring a touch of spring into your home.
Storing Tulip Bulbs
After your tulips have finished blooming, it’s important to properly store the bulbs to ensure their viability for future planting seasons. Storing tulip bulbs correctly will help them maintain their quality and ensure they are ready for planting when the time comes.
Here are some proper methods for storing tulip bulbs:
- 1. Digging up the bulbs: Carefully dig up the tulip bulbs after the foliage has turned yellow and died back. Use a garden fork or shovel to gently lift the bulbs from the soil, being careful not to damage them.
- 2. Cleaning the bulbs: Remove any excess soil or debris from the bulbs. Gently brush off the dirt or rinse the bulbs with water if necessary. Allow them to dry completely before storing.
- 3. Preparing the storage container: Choose a suitable storage container such as a mesh bag, paper bag, or cardboard box. Make sure the container has good ventilation to prevent moisture build-up.
- 4. Labeling the bulbs: It’s important to label the bulbs with the variety and color to easily identify them later. Use a permanent marker or attach a small tag to each bulb.
- 5. Storing in a cool, dry place: Find a cool and dry location for storing the bulbs. Ideally, the temperature should be around 60°F (15°C) with low humidity. Avoid areas with extreme temperature fluctuations or high moisture levels.
- 6. Avoiding direct sunlight: Keep the stored bulbs away from direct sunlight, as exposure to light can cause them to sprout prematurely.
By following these proper methods for storing tulip bulbs, you can ensure their viability and have healthy bulbs ready for planting in the next season. Remember to check on the bulbs periodically during storage to ensure they remain in good condition.
Frequently Asked Questions
- Q: What are the different types of tulip varieties?
A: There are various tulip varieties available, including single early tulips, double tulips, parrot tulips, and fringed tulips. Each variety has its own unique characteristics and bloom time.
- Q: How do I choose the right tulip varieties for my garden?
A: When selecting tulip varieties, consider factors such as bloom time, height, and color. Choose varieties that will complement your existing garden design and ensure a continuous display of blooms throughout the season.
- Q: What is the best way to prepare the soil for planting tulip bulbs?
A: To prepare the soil for tulip planting, ensure it is well-draining and enriched with organic matter. Remove any weeds or debris and loosen the soil to a depth of about 12 inches. This will provide a favorable environment for the bulbs to establish roots and grow.
- Q: How deep should I plant tulip bulbs?
A: Tulip bulbs should be planted at a depth of approximately 6 to 8 inches. This depth helps protect the bulbs from extreme temperatures and provides stability for the growing plants.
- Q: What are the optimal growing conditions for tulips?
A: Tulips thrive in full sun or partial shade and prefer cool temperatures. They require well-draining soil and regular moisture. It’s important to provide them with the right balance of sunlight, temperature, and moisture for healthy growth and abundant blooms.
- Q: How often should I water and fertilize my tulips?
A: Tulips should be watered regularly, keeping the soil evenly moist but not waterlogged. Fertilize them once in early spring and once after they finish blooming using a balanced fertilizer. Follow the package instructions for proper application.
- Q: How can I protect my tulips from pests and diseases?
A: To protect tulips from pests, consider using physical barriers, such as netting, and organic pest control methods. Proper sanitation practices and regular inspection can help prevent diseases. Remove any infected plants or bulbs promptly to prevent the spread of diseases.
- Q: What care and maintenance tasks are necessary for tulips?
A: Regular deadheading, removing faded flowers, and pruning can help promote continuous blooming. Dividing tulip bulbs every few years can prevent overcrowding and ensure healthy growth. Additionally, removing yellow or withered leaves can help maintain the overall appearance of the plants.
- Q: How can I extend the blooming season of my tulips?
A: You can extend the blooming season of your tulips by planting early, mid, and late blooming varieties. Mulching around the plants can help regulate soil temperature and retain moisture. Deadheading spent flowers and providing adequate nutrients can also encourage prolonged blooming.
- Q: Can I force tulip bulbs to bloom indoors?
A: Yes, you can force tulip bulbs to bloom indoors during the winter months. Place the bulbs in a paper bag and store them in a cool, dark place for about 8 to 12 weeks. Then, transfer them to a pot with well-draining soil and place in a sunny location. Water regularly and enjoy the colorful blooms.
- Q: How should I store tulip bulbs after they finish blooming?
A: After tulips have finished blooming, allow the foliage to wither naturally. Once the leaves turn yellow, carefully dig up the bulbs and remove any excess soil. Store them in a cool, dry place with good air circulation until the next planting season.